Cómo evitar manchas o marcas indeseadas al aplicar microcemento
Una mala aplicación del microcemento puede llevar a la aparición de manchas y marcas no deseadas. Problemas visuales que perjudiquen al acabado final. Si has llegado hasta aquí es porque te preocupa esta circunstancia y, sobre todo, porque quieres saber cómo puedes evitarlas a toda costa.
Estás en el lugar indicado. En este artículo no solo vamos a profundizar en las razones más comunes que provocan esas temidas marcas y manchas debidas a una mala instalación del microcemento alisado.
Además nuestros aplicadores experimentados te darán una serie de tips, consejos y soluciones a cada uno de los problemas para que no aparezcan imperfecciones no deseadas. ¡Toma nota!
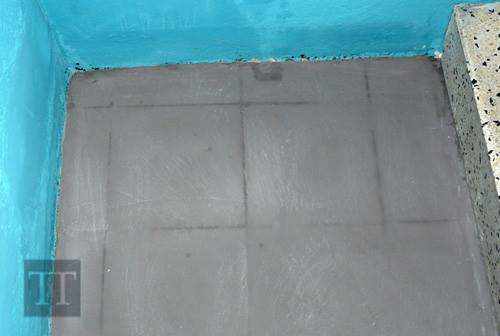
Marcas de las juntas de los azulejos al aplicar microcemento
¿Quieres aplicar el microcemento sobre azulejos? Estos son los 3 puntos a considerar para prevenir que las juntas de las baldosas queden marcadas
1. Prestar atención a la diferencia de absorción entre los azulejos y juntas
La resina contenida en el microcemento se absorbe de manera diferente. Si no se toma ninguna precaución corremos el riesgo de que aparezcan en forma de espectro visual al secar (patrón visual). La humedad en las juntas también provoca este defecto.

2. Las juntas de los azulejos suelen ser huecas
Las juntas suelen estar huecas y no están en el mismo plano que el azulejo. Además, la retracción del microcemento una vez seco puede generar un relieve en la zona de las juntas (un “dibujo” levantado). Por todo esto, con nuestros sistemas de microcemento creamos una capa que aísla y nivela la superficie.
3. Dejar secar 24 horas antes de aplicar microcemento
Es muy importante que, después de llenar las juntas de los azulejos, se deje secar 24 horas antes de comenzar con la aplicación de la base de microcemento.
Marcas de la llana en el microcemento
Es necesario aplicar el microcemento sin dejar rebabas ni relieves que marquen el paso de la llana, lijando esas imperfecciones en cada mano. Si aplicamos microcemento sobre una capa con rebabas, esos relieves se copiarán en el acabado siguiente.
Con la llana de acero y un exceso de presión, estas imperfecciones causan el efecto "quemado", manchas oscuras que reflejan la falta de lijado de la capa inferior de microcemento.

Irregularidades superficies microcemento
Después de la aplicación de cada capa de microcemento, hay que lijar la superficie. Un paso innegociable para evitar el efecto descrito en el apartado anterior. Efectuaremos un suave desbastado con una lijadora roto-orbital de bajas revoluciones o mediante guante de lijado, y lijas de carburo de silicio.
Aproximadamente 3 horas después de aplicar el microcemento alisado, se nota un cambio en el tono del revestimiento, volviéndose más claro. Este cambio de tono indica que el microcemento ya es transitable y que tiene la dureza suficiente para proceder con el lijado. Es importante mencionar que la temperatura, la humedad ambiental y la ventilación de la habitación influyen en este intervalo de tiempo.
Recomendamos lijar antes de las 12 horas tras aplicar el microcemento, para evitar que el recubrimiento endurezca demasiado, lo cual haría este paso más complicado.
Manchas de microcemento por exceso de lijado
Cuando realicemos el lijado de la última capa de microcemento, debemos trabajar el material suavemente. Con una mano tomamos la lijadora o el guante de lijado, y con la otra verificamos al tacto si el lijado es el correcto. Si trabajamos bien la superficie, evitaremos tres tipos de manchas típicas: círculos, líneas de contorno y marcas oscuras.
La lijadora tendrá que ser del tipo roto-orbital para evitar dejar círculos. Nos aseguraremos de mantenerla en movimiento de manera constante sin incidir de manera prolongada en el mismo lugar. Si el lijado fuera excesivo terminaríamos viendo el microcemento alisado de la capa anterior y dejando unas "curvas de nivel" características que indicarían que hemos pasado a la capa inferior. En cuanto la lija se desgaste tendremos que cambiarla, si no realizamos el cambio, la lija pasa de lijar a pulir dejando marcas negras en el microcemento.
Marcas de microcemento por exceso de pulido
Si el acabado del microcemento no es el deseado, lo más adecuado es aplicar una capa adicional de microcemento alisado. Hacer retoques sobre la superficie ya seca dejará marcas visibles y poco atractivas.
Sobre trabajar una zona con la llana generará marcas oscuras. Esto puede ocurrir, por ejemplo, cuando se acumula material en el piso al final del trazo de aplicación, obligándonos a recoger el exceso de microcemento alisado y trabajarlo más con la llana, causando esas manchas.
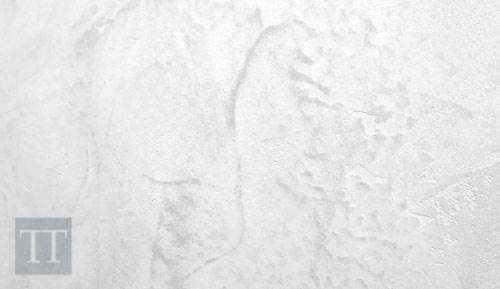
Si repasas demasiado una zona lo que haces es forzar el secado. Este problema se refleja en el blanqueamiento de la zona. Por ejemplo: Una pared negra podría tener manchas grises mucho más claras que el color de microcemento elegido.
Si el aplicador repasa demasiado toda la superficie o presiona demasiado el soporte de microcemento alisado, puede resultar en un color más claro. Es muy común ver una pared negra que parece gris.


